CREATE DRIVER WITH DIFFERENT COMPILERS | YOUR DEVICE DRIVER
The project to build your own myfanuc.dll for your devices was created with Visual Studio 2017. If you’re using Visual Studio 2013 it is sufficient to open myfanuc.sln, right click project device -> Properties -> Configuration Properties -> General and change Platform Toolset to Visual Studio 2013 - Windows XP (v120_xp).
In case you use a different compiler follow the steps below, tested with Visual Studio 2008 and 2010.
STEPS
Start Visual Studio, click on File -> New -> Project
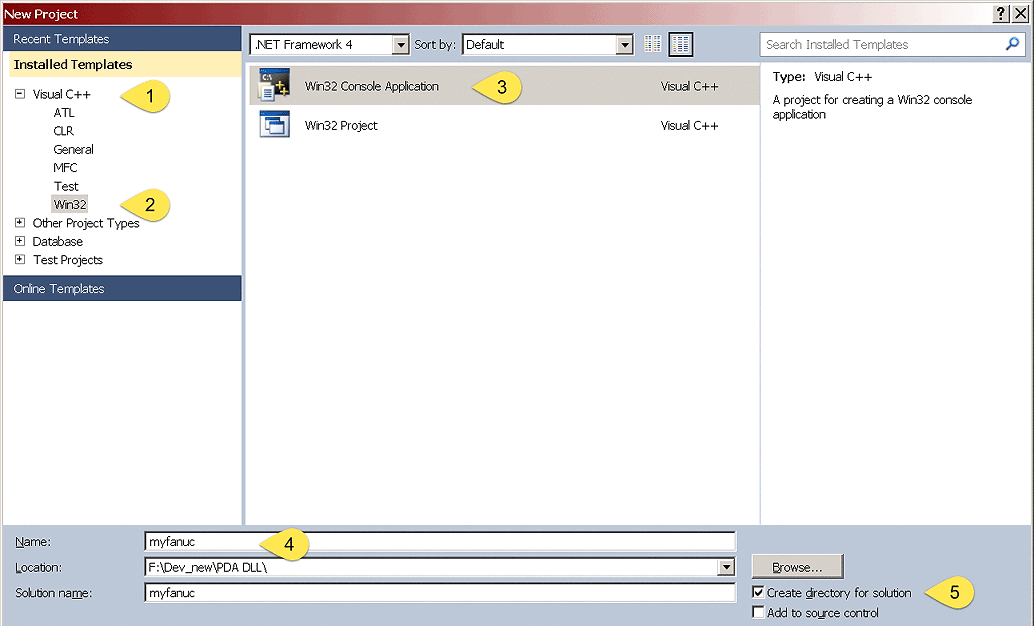
Select on the left side under Visual C++ (1) Win32 (2), Win32 Console Application (3)
FIG 1: Choose correct settings
Name: Enter myfanuc (4) (all lowercase)
Check Create directory for solution (5)
Location: Adjust the directory if needed
Click [OK]
Click on Application Settings (left side)
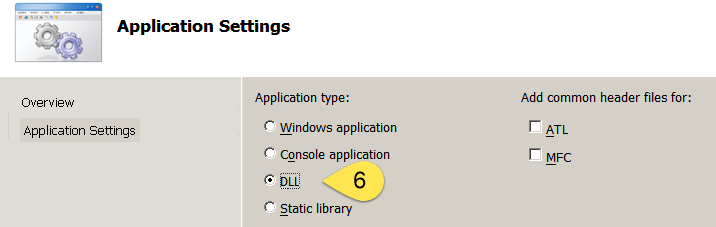
FIG 2: Set application type
Select Application type -> click DLL (6) (uncheck all other items like MFC)
Click [Finish]
In Solution Explorer:
Right click project name myfanuc (not Solution!) select Properties
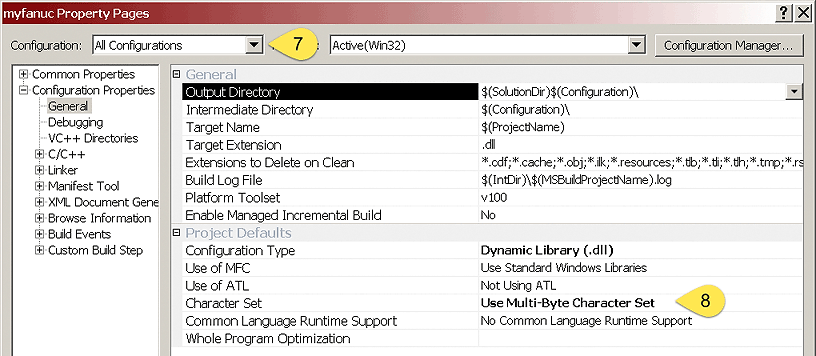
In Properties select Configuration: All Configurations (7)
Character Set: Use Multi-Byte Character Set (8)
FIG 3: Use MBCS
Under C/C++ -> Warning Level -> Level2 (/W2) (recommended)
Check C/C++ -> Code Generation -> Runtime Library Debug: If Runtime Library is set to Multi-threaded Debug DLL (/MDd) change it to Multi-threaded Debug (/MTd) Release: If Runtime Library is set to Multi-threaded DLL (/MD) change it to Multi-threaded (/MT) If you do not change these settings your DLL will not work on other Windows versions!
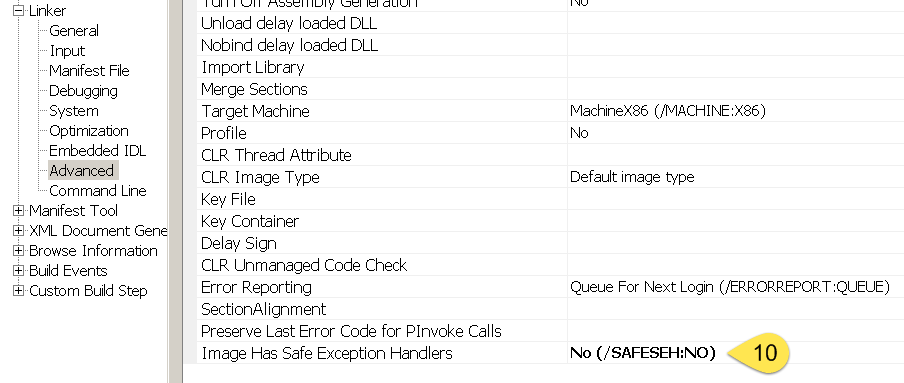
(Visual Studio >= 2010 only) Section Linker -> Advanced -> Image Has Save Exception Handlers: No (SAFESEH:NO)
FIG 5: Turn off save exception handlers
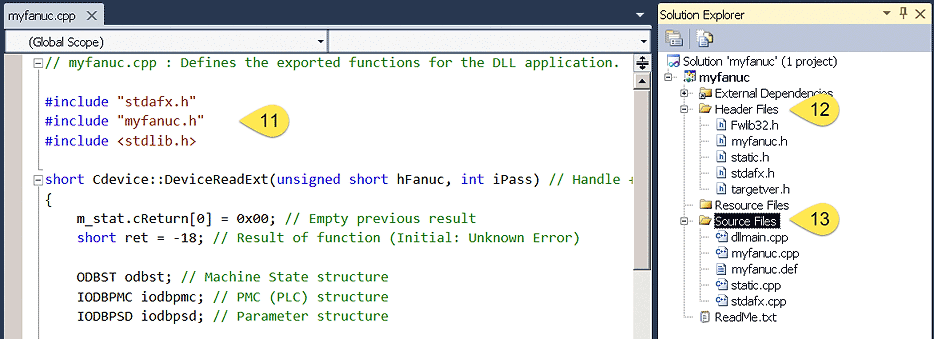
Import files to your project
FIG 6: Import files into your project
Close the previously created project
Copy all .cpp, .h and .dev files from the ‘myfanuc’ ZIP file of the device project into your project folder that contains myfanuc.cpp, overwrite the existing files!
Open your project again
In Solution Explorer right click Header Files -> Add -> Existing Item select myfanuc.h, static.h and Fwlib32.h
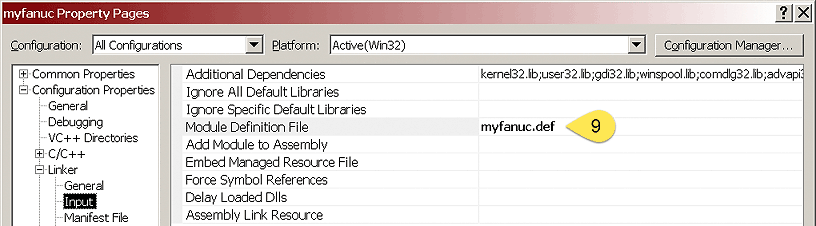
In Solution Explorer right click Source Files -> Add -> Existing Item select static.cpp and myfanuc.def
Right click project name device (Solution Explorer) select Rebuild.
Make sure that your project compiles without errors.
Privacy notice
This website uses cookies. By continuing to use it you agree to our privacy policy.